It seems that every year payment systems one by one try to make new surprises for us. This time the surprise became from popular and known E-bullion payment system which always was considered as closed type payment system which doesn’t put into the own practice any alien business methods and stereotypes. There was set a rumor that E-bullion system is going to follow the well-known E-gold payment processor because these two systems have the same work principles and they are based on one technology. The social majority can think about this situation, “Hm... it is really strange. Why successful and developing company aim to go out from success way?” Unfortunately the recent events explain a lot of these questions and confirm the rumors. On Monday, 28 July 2008, at 6:30 PM there was found stubbed Pamela Fayed, one of co-founders E-bullion. Woman died because of numerous stabs. This news shocked social community and especially the way of murder. There are a lot different hypothesizes about...
File Creation

From the Main Menu press F7 or click the Quick Cash® Utilities button

 |
| Press F5 or click the File Creation button. |
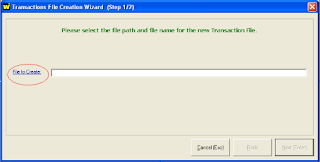 |
| Click on the File to Create button. |
Select the destination of the new File. Type in a name for the file and
|
click the Save button.
|
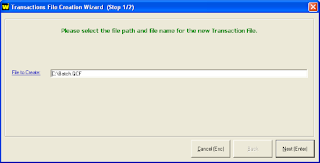 |
| Press Enter or click the Next button. |
 |
| You can choose from Single Add, Add from Previous and Add from File. |
Single Add
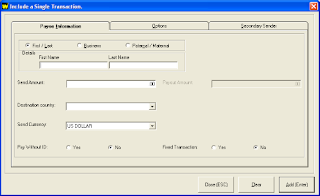
| Fill out the information in the Payee Information tab and click on the | Options tab. |
| Fill out the information in the Options tab and click on the Secondary | sender tab. |
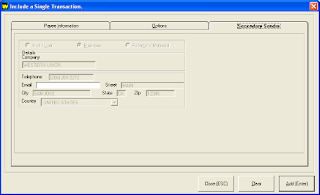
| These fields should be automatically filled out by the system with your | information. Press Enter or click on the Add Button |
A new transaction can be added to the batch here. If no more
transactions need to be added press ESC or click the close button
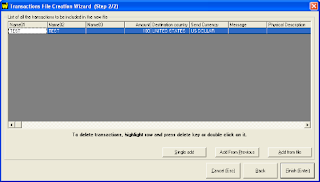 |
| A list with the transactions appears. Press Enter or click the Finish button. |
 |
| A confirmation screen appears. Press Enter or click OK. |
Add From Previous.
 | |||
| Select the Enable session ID filter box. All previous sessions are | displayed. Select one of the sessions available and press Enter or click | Next |
Select the transactions that need to be added and press Enter or click the
Add button.
 |
| A list with the transactions appears. Press Enter or click the Finish button. |
Add from file
 |
| Click on the Quick Cash File button. |
 |
| Select the file that contains the transactions that need to be added to the new file. Click on the Open button. |
 |
| Press Enter or click Next. |
Select the transaction from the list and press Enter or click on the Add
| button. |

 |
| A list with the transactions appears. Press Enter or click the Finish button. |
Import File
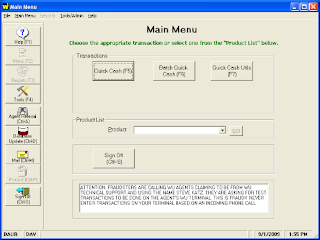 |
| From the Main Menu press F7 or click the Quick Cash Utilities button |
 |
| Press F8 or click the Import File button. |
 |
| Select one of the options and press Enter or click the Next button |
 |
| Click on the File to Import button. |
 |
| Locate the file you wish to import and click Open. |
 |
| Press Enter or click Finish. |
| A confirmation screen appears and the session number is displayed. Press | Enter or click OK |
 |
| Press ESC or click Close. |
 |
| A confirmation screen appears. Press Yes. |
Change Transaction
This option is only for transactions with “In Execution” status. “In Execution” means that the transmission of the file was somehow interrupted; therefore, the transfers may not have reached the WU server.
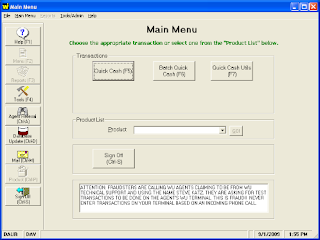 |
| From the Main Menu press F7 or click the Quick Cash Utilities button |
 |
| Press F9 or click the Change Transaction button. |

| Click the Enable Session ID filter box. Select the session ID that needs to | be changed. Press Enter or click on the Next button. |
 |
| Transactions with a status of In execution are displayed here. |
Excel Config
 |
| From the Main Menu press F7 or click the Quick Cash Utilities button |
 |
| Press F7 or click the Excel Config button. |
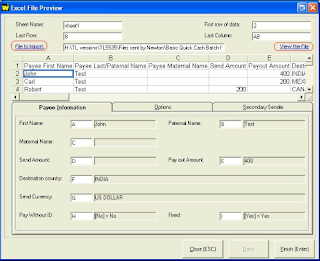
Click on the File to Import button and select the file that needs to be checked /configured. Click the View the File button. Click the Payee information, Options, and Secondary Sender Tabs for verification.
Once the settings have been made, press enter or click on Finish to validate the configuration. The system will confirm the success or failure of the action.
The Western Union® Translink software package configured for the Quick Cash® service has been sent to you already preconfigured with the correct mapping for a standard Excel batch import, also included in C:\Program Files\Western Union\Universal-Release which is the default
installation path.
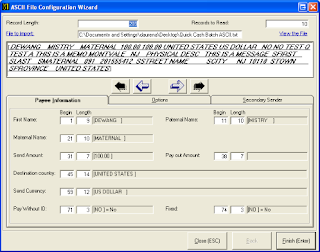
ASCII Config
 |
| From the Main Menu press F7 or click the Quick Cash Utilities button |
 |
| Press F6 or click the ASCII config button. |
Click on the File to Import button and select the file that needs to be checked /configured. Click the View the File button. Click the Payee information, Options, and Secondary Sender Tabs for verification.
Once the settings have been made, press enter or click on Finish to validate the configuration. The system will confirm the success or failure of the action.
The Western Union Translink software package configured for the Quick Cash® service has been sent to you already preconfigured with the correct mapping for a standard Ascii import, also included in C:\Program Files\Western Union\Universal-Release which is the default
installation path.



Comments
Post a Comment